Using Respresso, all team members can edit software resource files. This helps you to efficiently collaborate and save time. As we add different team members, we need to limit their ability to edit resources. This is why Respresso has role-based access control.
Team and project structure
Generally speaking, Respresso groups users into teams. Each team can have multiple projects. Team members can be assigned to the team’s projects. Without project membership, team members can’t access the projects, only to list them.
Invite team members
Before you can add somebody to a project, you need to add them to your team. To do so, you have to have a team admin or team owner role.
You can invite users to Respresso by sending an invite directly to their email inbox. To send an invite, you have to go to the Team Dashboard / Team Settings / Edit Team Permissions screen and press the New Invite button.

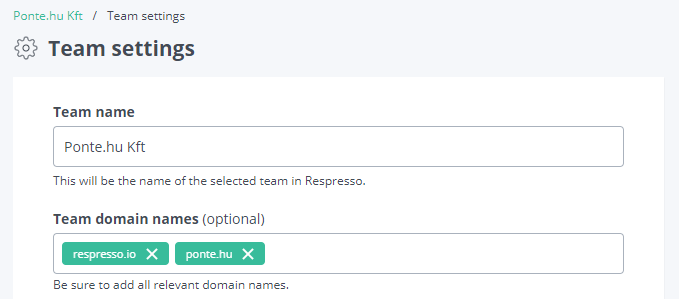
Alternatively, you can allow anyone to join within your company domain. To add a domain, you have to go to the Team Dashboard / Team Settings and add it to the Team domain names. Eg.: we could add the respresso.io domain to allow all our team members to join.

Team level roles
Everyone who joins a team starts with the lowest, team member role. To grant a higher role, you need to go to the Team Dashboard / Team Settings / Edit Team Permissions. On that screen, select the proper role for the user.

Team role hierarchy:
- Team member: Can list all projects’ names and submit join requests.
- Team admin: Can edit team settings, create new projects and invite and manage team members with member or admin roles.
- Team owner: Can manage project subscriptions, view invoices, and manage team members with owner role.
Add project members
As we mentioned above, any team member can submit a request to join a project. Although, a project admin also can add any team member. To do so, you need to go to the Project Dashboard / Project Settings / Edit Project Permissions and click on the user’s name. By default, everyone will get only a viewer role.

Please note, that there is no invite option, only team members can join a project. If you have to add someone outside your team, you must also add them to the team first.
Project level roles
A project admin can manage project permissions. (Project Dashboard / Project Settings / Edit Project Permissions).

Project role hierarchy:
- Project viewer: Can view all the resources.
- Project member: Can edit existing resources, but with restrictions. With this role, the user can edit existing resources but should not be able to change or remove anything that could break your app. (Eg.: resource keys are read-only.)
- Project editor: Can edit, add or remove resources, without restriction. This role is required to use integrations (Figma, Adobe XD, and Zeplin).
- Project admin: Can edit project settings, flows and manage project users.
Our recommendations
As a rule of thumb, you should keep users’ access roles as low as possible. This can prevent errors and unauthorized or unintended modifications.
Team permissions are simple: Everybody should be only at the member level. Except for your system admins (admin level) and account managers (owner level).

Project permissions should be determined on a case-by-case basis. Our recommendations are as follows:
- Developers: Project editor. In case of Flow customizations: Project admin.
- Designers: Project editor.
- Testers: Project viewer or Project member.
- Translators: Project member.
- Clients: Project viewer or Project member.
- Managers and POs: Project member.


